With my previous post Creating HDInsight Hadoop Cluster using SSIS and processing unstructured data using Hive Task - Azure Feature Pack - Part I, I discussed how to prepare the environment for processing unstructured data using SSIS. With that, I explained the key requirements for this;
- Integration Services Feature Pack for Azure
- Microsoft Hive ODBC Driver
- Self-Signed certificate for adding Azure
Now let's see how we can create a SSIS package for handling the process. Assumption we made with part I is, you have a file that contains unstructured data. Let's say it is something like below;

Let's talk about a simple process for testing this. The above file is the famous file called davinci.txt, that is created with Project Gutenberg and used to demonstrate famous word count big data demo. So the assumption is, you have this file and you need to achieve word count from this file as part of your ETL process. In order to achieve this using SSIS with the help of HDInsight, following have to be done;
- Upload the file to Azure Storage
- Create the Hadoop Cluster on-demand (you can have it created if you are continuously using it)
- Process the file using HiveQL for getting the word counts
- Finallay, read the result into local database.
Let's start working on it. For uploading a file to Azure Storage, Azure Blob Upload Task that comes with Integration Services Feature Pack for Azure can be used. All it needs is a connection for the storage.
Create a SSIS project and have a package with a proper name. Drag Azure Blob Upload Task and drop on to Control Flow. Open its editor and create a new connection. New connection dialog box requires Storage account name and Account key. If you have a storage created in your Azure subscription, then access it and get the name and key1. If you do not have a storage, create it and then get them.

This is how you need to set the connection with SSIS.

In addition to the connection, you need to set following items with it;
- Blob container - make sure you have a Container created in your storage. I use CloudXplorer for accessing my Azure storage and I can easily create containers and folders using it. You can do it with PowerShell, Visual Studio or any other third-party tool.
- Blob directory - Destination. A folder inside the container. This folder is used for storing your file in Azure Storage.
- Local directory - Source. Location of the file you keep davinci.txt file.
Once all set, task is ready for uploading files.

Next step is, adding Azure HDInsight Create Cluster task on to Control Flow. Drag it and drop and open the editor for configuring it. This requires Azure Subscription Connection which has to be created with following items;
- Azure subscription ID - this can be easily seen with Settings when accessing the subscription via Classic Portal (see Part 1)
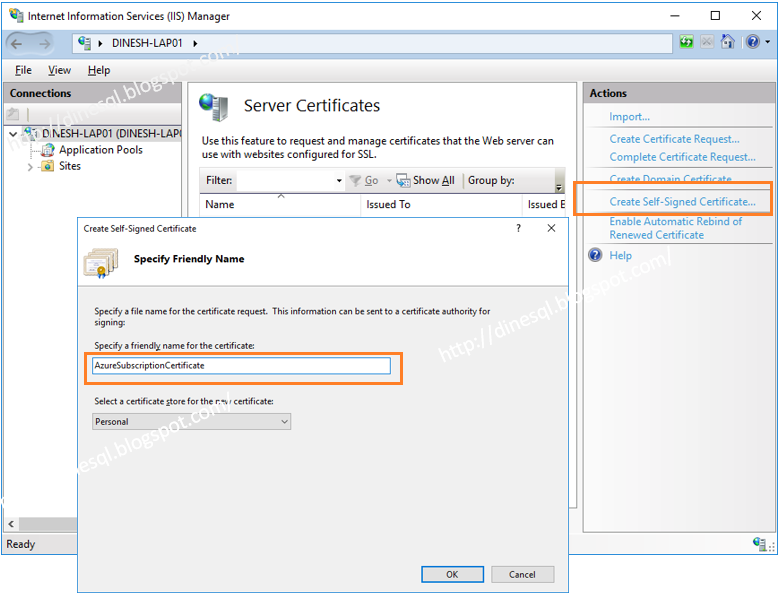
- The Management certificate thumbprint - this is what we created with Part I and uploaded to Azure. This should be browsed in Local Machine location and My store.

Once the connection is created, you need to set other properties;
- Azure Storage Connection - Use the same connection created for upload task.
- Location - Use the same location used for the storage
- Cluster name - Set a unique name for this. This is your HDI name
- Cluster size - set number of nodes you want for your cluster
- User name - set the user name of administrator of your HDI.
- Password - set a complex password for the user.

Second task in the control flow is ready. Next task is for executing HiveQL query for processing data. I have some posts written on Hive: What is Hive, What is Hive Database, What is Hive Table?, How to create a Hive table and execute queries using HDInsight. Have a look on it if you are new to Hive. Azure HDInsight Hive Task is the one we have to use for processing data using HiveQL. Drag and drop it, and configure like below.
- Azure subscription connection - Use the same connection created for above task.
- HDInsight cluster name - Use the same name given with previous task.
- Local log folder - Set a local folder for saving log files. This is really important for troubleshooting.
- Script - You can either set HiveQL as an in-line script or you can have you script in a file saved in a storage, and refer it. I have added the query as an in-line script that does;
- Create an external table called Words with one column called text.
- Execute a query that aggregates data in Words and insert the result to WordCount table.
DROP TABLE IF EXISTS Words;
CREATE EXTERNAL TABLE Words
(
 text string
) row format delimited
fields terminated by '\n'
stored as textfile
location '/inputfiles/';
DROP TABLE IF EXISTS WordCount;
CREATE TABLE WordCount AS
SELECT word, COUNT(*) FROM Words LATERAL VIEW explode(split(text, ' ')) lTable as word GROUP BY word;

We have added a task for uploading the file (you can upload many files into the same folder), a task for creating the cluster and a task for processing data in added files. Next step is, accessing the table WordCount and get the result into local environment. For this, you need a DataFlow task. Inside the DataFlow, have an ODBC data source for accessing Hive table and a destination as you prefer.
Let's configure ODBC source. Drag and drop and set properties as below.


Let's configure ODBC source. Drag and drop and set properties as below.
- ODBC connection manager - Create a new connection using Hive ODBC connection created with Part I.
- Data access mode - Select Table Name as HiveQL stores the resultset into a table called WordCount.
- Name of the table or view - Select WordCount table from the drop-down.
- Columns - Make sure it detects columns like below. Rename them as you want.

Note that you cannot configure the source if you have not created and populated Hive table. Therefore, before adding the DataFlow task, execute first three control flow tasks that upload the file, create the cluster, process data and save data into the table. Then configure the DataFlow task as above.
Add a Data Reader destination for testing this. You can add any type of transformations if you need to transform data further and send to any type of destination. Enable Data Viewer for seeing data.

Now you need to go back to Control Flow and add one more task for deleting the cluster you added. For that, drag and drop Azure HDInsight Delete Cluster Task and configure just like the way you configure other Azure tasks.

That is all. Now if you run the package, it will upload the file, create the cluster, process the file , get data into local environment, and delete the cluster as the final task.


This is how you use SSIS for processing unstructured data with the support of HDI. You need to know that creating HDI on-demand takes long time (than I expected, already checked with experts, waiting for a solution). Therefore you may create the cluster and keep it in Azure if the cost is not an issue.