Showing posts with label Back up database. Show all posts

Saturday, March 18, 2017

SQL Server Backup Expiry Date Setting

I would say, this is the most confusing property in the Microsoft SQL Server. Most misunderstand it and most do not know how it works. Although there are many posts on this, only few explains it with an example, and some articles/posts make it more confused, hence making this post the way I understand;

If you refer MSDN, it explains it well but in simple term, what it says it, if you set an expiry date for your backup set (if you need to understand what is backup media set, backup media family, backup device or backup set, read this)  or if you set Retention days, the backup set can be overwritten only when the backup set is expired or after number of days mentioned with Retention days (this is shown as After x days in GUI).

Simply, if I take a backup today (19-Mar-2017) and set the expiry date as 25-Mar-2017, I will not be able to overwrite the backup set until 25-Mar-2017. Remember, backup can be restored any day regardless of the expiry date set.

Here is an example;

Let's take a backup of AdventureWorks2014 database. See both ways; using GUI and TSQL. Note that I have mentioned a name for Media too. Without this, expiry setting will not as we expect.


BACKUP DATABASE [AdventureWorks2014] 
TO  DISK = N'E:\DatabaseBackups\AdventureWorks2014.bak' 
WITH  EXPIREDATE = N'03/25/2017 00:00:00', FORMAT, INIT
,  MEDIANAME = N'Media01',  NAME = N'AdventureWorks2014-Full Database Backup'
, SKIP, NOREWIND, NOUNLOAD,  STATS = 10
GO

Now if you try to take another backup to the same media by overwriting the existing backup sets;


BACKUP DATABASE [AdventureWorks2014] 
TO  DISK = N'E:\DatabaseBackups\AdventureWorks2014.bak' 
WITH NOFORMAT, INIT
,  MEDIANAME = N'Media01',  NAME = N'AdventureWorks2014-Full Database Backup'
, NOSKIP, NOREWIND, NOUNLOAD,  STATS = 10
GO

SQL Server will throw this error;


If you still need to overwrite it, with TSQL, you can use SKIP instead of NOSKIP, or with GUI, do not mention the Media name.

Friday, November 18, 2016

Microsoft SQL Server Backup to Windows Azure Tool

Earlier I made a post on SQL Server Backup to URL: SQL Server Backup to URL - Now easier than before that explains how to take a backup of SQL Server 2016 database using new Management Studio. However, backup to Azure was not something new with SQL Server 2016, it was started with SQL Server 2012 (without GUI support) and improved with GUI support with SQL Server 2014. Read this post for more information on it;

There is another way of backing up SQL Server databases to Azure which is based on a tool called Microsoft SQL Server Backup to Windows Azure. Good thing with this tool is, it is not limited to a specific version of SQL Server, it can be used with any version of SQL Server. Note that it is not a new tool, it is a quite old tool but the latest version is published in June 2016.

Let's see how we can use this tool for backing up databases and restoring from it;

First thing you need to do is, download and install this. You can download this either from:
If you do not need other related tool for SQL Server, use the second URL for downloading the tool. Once downloaded, you can see the installed tool as Microsoft SQL Server Backup to Windows Azure Tool Configuration, start it. This is what you see with its first screen;


This screen allows you to add Rule. Click on Add and continue. The rule is all about, which location this service needs to monitor and what files it should consider. Specify your backup location and file name pattern. Usually, pattern name is *.bak.


Click on Next to continue. Then you need to specify the storage. Make sure the storage you have created is Classis and it as a Blob Container for holding backups. Set the Storage Name, Access Key and Container.


Once you clicked Next, you can enable Encryption and Compression and click Finish button. You should see the rule you added, and it allows you to add more rules as well as modify existing rules.


Let's see this works with backing up operations. First let's backup WideWorldImporters database to a different folder and see the size of it. Make sure you have enabled Compression.


The size of the compressed backup is 165 MB:


Let's take the same to the folder which is configured with the tool. Do NOT enable compression. Note that it will take time more that the time took with previous step as it need to transfer data to Azure.


Check the folder after backup operation is completed. You will see a small file which is NOT your backup of the database. It is called as a stub file that contains some metadata which can be used for restore operation.


If you check the Azure Storage now, you will see two files have been created and placed. One is the same stub file and the second is the blob for the database backup. Since you have the same stub file in the Azure Storage, you can take a copy of it during the restoration operation if you have lost the local file.


If you open the Stub file using a Text Editor, you should see similar content;


If you need to restore the database, you can refer the stub file as the backup through standard restoration window and SQL Server will access the backup from Azure Storage for getting the backup.

As you see, this tool is very useful, specifically when you have multiple versions of SQL Servers. Best thing is, you do not need to write specific codes for transferring files from local environment to Azure as it is automatically done by the tool whenever a backup is placed.

As you see, the size of the backup file after getting it compressed by the tool is 130 MB which is lesser than the SQL Server compressed backup. Since it supports encryption as well, in a way it is better than SQL Server Backup to URL.


Friday, January 8, 2016

Taking backups of Azure SQL Database and restoring to on-premise server

A database server without a backup strategy is a disaster and if you have no strategy implemented, you invite for troubles. However this traditional approach cannot be implemented with Azure SQL Databases because most of the backup requirements are automatically done. Azure SQL Database offers built-in backup and restore facility that is an automated operation. This automatically provides disaster recovery, recovery of data corruption and eliminates manual backups. These backups are retained for 7 days, 14 days and 35 days for Basic, Standard and Premium tiers respectively and Point-In-Time restoration is available too.

However, when you need a copy of your Azure SQL Database to local environment, how do you do it? You do not get traditional .bak files and it cannot be restored using traditional interface. But this can be achieved using Export functionality given. Here are the steps for getting you Azure SQL Database to on-premise server.

First of all, make sure that you have a classic storage account configured. You cannot export the backup, of course it is bacpac file, to a storage created with the new portal storage blade.

Once the storage is ready, open your database using SQL Databases blade and click on Export.


Then select the classic storage and the container. Name the bacpac file as you want, and click Create.


This will create the bacpac file and add to the storage. Then get file into local environment (you can use a third party tool for this too) and access it using Management Studio.


This takes you through the wizard, select the bacpac file saved and continue with the wizard. Note that you can directly refer the storage account if you can connect with it, rather downloading the file manually.


Done, now you have the database in your environment.

Wednesday, August 26, 2015

Product review: CloudBerry Backup - Cloud Backup for Microsoft SQL Server

One of the important assets to an organization is data, because it holds valuable information related to the business, such as customers info, products info, financials info and info related to operations performed. In most businesses, downtime is unacceptable, hence take all possible measures to make sure that data is available, protected and recoverable in the event of a disaster or failure. Organizations deploy different solutions such as high-availability solutions, disaster recovery solutions and backup strategies for addressing these requirements. High-availability and disaster recovery solutions are not common with all organizations but backup strategies are the most common implementation for protecting data.

This post speaks about one of the best products; CloudBerry Backup that can be used for backing up Microsoft SQL Server databases to cloud storage accounts with almost all backup features offered by SQL Server.


CloudBerry Backup for SQL Server allows you to perform your backup operations as per the strategy you have planned. Plan could be a simple Full backup, or it could be a combination of Full, Differential, and Transaction Log backups based on RPO and RTO required by the business. You may encrypt it, you may compress it and most importantly you may expect point-in-time restoration in case of data-error or a failure. Not only that, you may want to store your backups in a cloud storage account such as Microsoft Azure or Amazon, or OneDrive, making sure backups are secured and protected. Yes, you can satisfy some of these requirements using functionalities provided with SQL Server but not all. For example, there is no direct way of placing backups into a different cloud storage account other than Azure. It is also available only with SQL Server 2012 SP1 or later, hence requires additional coding if it needs to be done with a prior version. Good news is, all these requirements can be satisfied with the CloudBerry Backup product regardless of the SQL Server version. Not only that, it does not require administration knowledge allowing even a beginner to perform backup operation as per the strategy established.

Let's see how this product works and how easily we can backup our databases.

CloudBerry Backup can be downloaded from following page in CloudBerry Lab site.

http://www.cloudberrylab.com/microsoft-sql-server-cloud-backup-software.aspx

Once the download is completed, install it and open it. You will get the product activation window, if you have the license key, enter it and get it activated, else you con continue with trial version clicking Continue Trial button.


CluoudBerry Backup opens with its Welcome window. You can create your backup plan by clicking either MS SQL Server button in the Home ribbon or Backup SQL Server button in the welcome screen.


Before start creating the plan, you need to prepare for two things; backup strategy and cloud storage account. Let's plan on AdventureWorks database and 
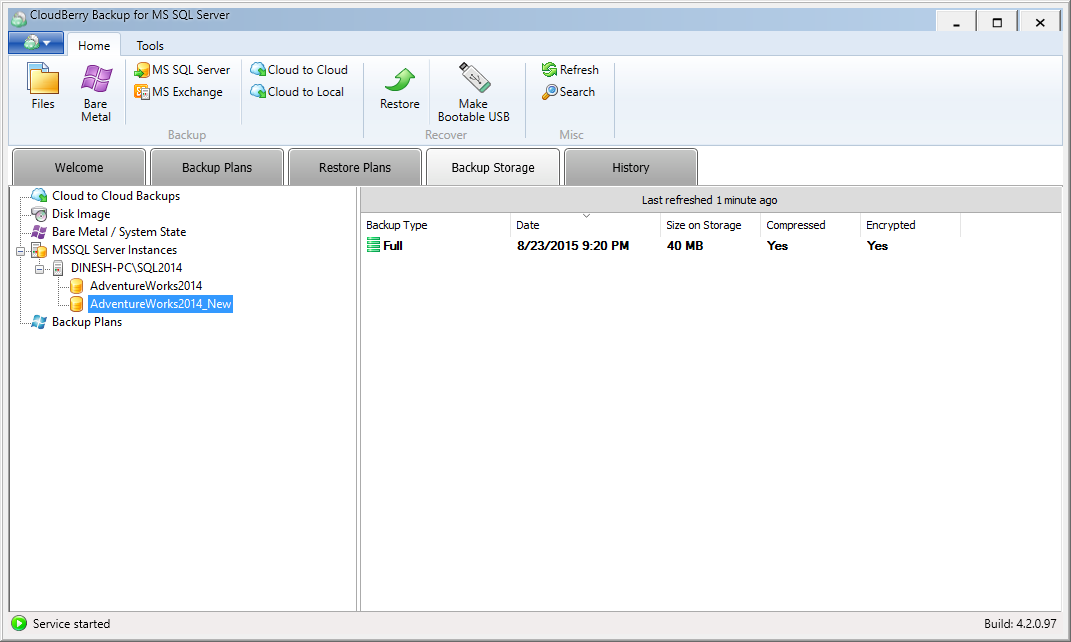
Microsoft Azure as the storage. If you need, you can use your own database, else download AdventureWorks2014 and restore it as AdventureWorks2014_New for testing. Assume that backup plan as per the RPO and RTO is as follows;

  • Full database backup - every Saturday - 4:00am
  • Differential backup - week days - 14:00am
  • Transaction log backup - week days - every hour - day time
If you already have an account with Microsoft Azure, use it for creating a storage, else create an account and then create a storage. Here is my Microsoft Azure Storage configured.


Everything is ready, let's start creating the plan over a database AdventureWorks2014_New. Click on Backup SQL Server button in Welcome screen. It opens Welcome screen of MS SQL Server Backup Plan Wizard.


Click on Next to continue. Next screen is for selecting the Cloud Storage account. Good thing with CloudBerry Backup is, it allows us to select our preferred cloud storage account from a lengthy list without just offering one platform. Let's select Azure for this.


You need to configure Azure account with this. Select , it opens a window for entering account details. Note that it needs a container too. Once the Display Name, Account and Shared key are entered, select  in the Container dropdown and give a name for it.


Click OK twice and click on Next to continue. You will get screens for naming the plan, selecting the SQL Server with credentials and selecting the database.


As you see with the last scree, you can either select one database or multiple databases. Since the plan is for one database, select the one you need. Click on Next to continue. Next option is for encrypting and compressing the backup. CloudBerry backups support encrypting and compressing on almost all versions of SQL Server starting from SQL Server 2000.


Next screen is for selecting or configuring purging options. You can either accept the default or can configure as you want.


Click on Next to continue. This screen is for selecting the schedule with options. This screen allows you to take a backup without creating a schedule or a plan, schedule it for a specific time, go for a general strategy with a predefined templates or go for a customized  schedule. Not only that, this has two more additional , important options Stop the plan if it runs for n hours and Run missed scheduled backup immediately when computer starts up. This is something we do not get with general backup in SQL Server. Since we need a customized plan, let's select Recurring (advanced schedule).


Next screen is for executing additional operations before performing the backup and after performing the backup. It allows you to select files like exec, bat files. If you have anything to be done, add them with this screen.


Next screen is for configuring notifications. Various options are given, email notifications can be set up either using CloudBerry facility or using SMTP configured. In addition to that, entries can be made to Windows Event Log too.


Done. Click on Next to see the Summary. Then click on Next and Finish selecting Run backup plan now.


Plan is created. It shows you the details of the plan and Next Run Time.


It allows you to take a backup even though it is scheduled. If you click on Run backup now, it will take a full backup and place in your Azure storage.


Since we have enabled notification, this sends us an email;


You can see how files are created and placed them in your storage account. If you use Microsoft Azure, then portal can be used for seeing files in the container or a tool like CloudBerry Explorer for Azure Blob Storage can be used.


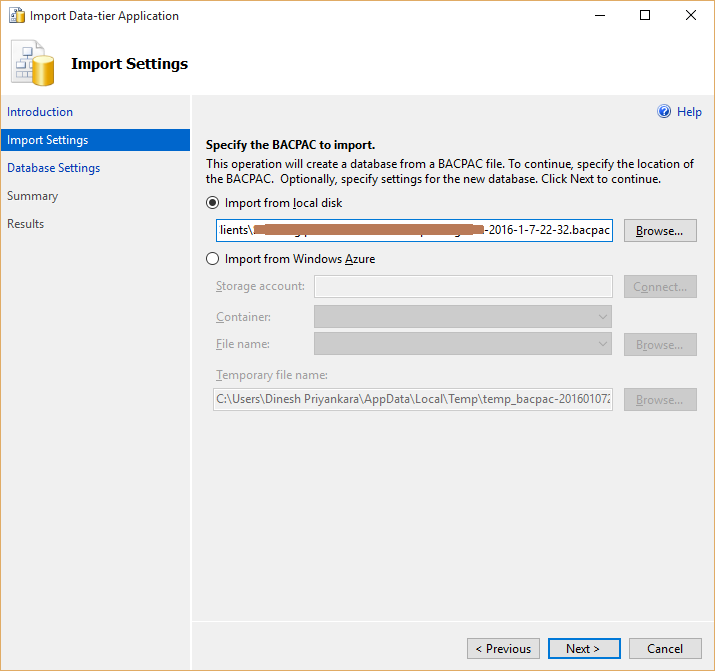
Restoring databases from CloudBerry Backup is an easy task. It allows you to either restore a backup from a stored backup or create a plan on restoration. Point-In time restoration is also possible with this and it will pick the right files based on the date and time given. Here are few important screens of restore operations;


In addition to the screens above, screens are there for decryption, server selecting, emailing, etc.

As you see, it is really easy to manage your SQL Server backup strategies with CloudBerry Backup. If you still thinking why should you go for this tool, consider following;
  • Easy management and scheduling, plan can be simply created.
  • Any cloud storage, not just one. Storing them directly to Azure without doing any configuration to the instance.
  • Encryption and compression on any version of SQL Server without creating master keys and encryption keys.
  • Purging options
  • Pre and post actions
  • Notification facility even without SMTP configuration.
  • Backup file management in the container configured.
Try with fully function trial, go to http://www.cloudberrylab.com/microsoft-sql-server-cloud-backup-software.aspx and download it today. You will see how useful and worth it soon.

Tuesday, February 10, 2015

Reading the content of the databse while restoring backup-sets: Restore with STANDBY

Assume that you have multiple transaction log backups that have been taken every hour, starting from 9am to 5pm, and you need to restore the database up to a certain set of transactions that have been happened during the day, how do you do it? If you do not know the exact time-tag of the transactions and no name given for the transactions, then restore with STOPAT or STOPATMARK is not possible. Since we cannot read the content of the database during the restore process, only way to figure it out is, restore one set (full database backup and 9am transaction log backup), complete and read the content. If the required content is not there, then restore the again with another set (full database backup, 9am transaction log backup and 10am transaction log backup). Again, If the required content is not there, then restore the again with another set (full database backup, 9am transaction log backup, 10am transaction log backup, and 11am transaction log backup). This unnecessary, time-consuming process has to be continued until you see your transactions in the database. What if SQL Server allows you to see the content during the restoration that helps you to identifying the last transaction log backup to be restored?

If you have more than one backup-set to be restored, all backup-sets should be restored with NORECOVERY option except the last one. Last one should be restored with RECOVERY option. Until that database remains Recovering state which blocks users connecting with it. Simply NORECOVERY option does not allow users to access the database until a backup-set is restored with RECOVERY. However, using STANDBY option instead NORECOVERY allows you to read the content of the database between transaction log restores.

Generally, SQL Server rolls back uncommitted transactions at the end of restore process with RECOVERY option to make the database readable. The STANDBY option also rolls back uncommitted transactions but keeps all the information needed for "undo" process which will allow for further restore. This basically allows you to read the content of the database after one transaction log restoration, without completing the restore process. Since it keeps necessary information for "undo" process, if required content is not available in the database, you can continue the restore process with additional transaction log backups.

This option is the best way of restoring the database for above-mentioned situation.

Here is a sample code for understanding restore operation with STANDBY option.

Backing up the database with full and multiple transactions log backups.

-- Creating a database for testing
USE master;
GO

IF EXISTS (SELECT * FROM sys.databases WHERE name = 'TestDatabase')
 DROP DATABASE TestDatabase;
GO

CREATE DATABASE TestDatabase
ON PRIMARY
(
 NAME = N'TestDatabase_Data'
 , FILENAME = 'C:\Program Files\Microsoft SQL Server\MSSQL12.SQL2014\MSSQL\DATA\TestDatabase_Data.mdf'
 , SIZE = 10240KB, FILEGROWTH = 1024KB
)
LOG ON
(
 NAME = N'TestDatabase_Log'
 , FILENAME = 'C:\Program Files\Microsoft SQL Server\MSSQL12.SQL2014\MSSQL\DATA\TestDatabase_Log.ldf'
 , SIZE = 5120KB, FILEGROWTH = 10%
);
GO

-- Changing the recovery model to full
ALTER DATABASE TestDatabase SET RECOVERY FULL;
GO

-- Take the initial backup
BACKUP DATABASE TestDatabase
 TO DISK = 'C:\Program Files\Microsoft SQL Server\MSSQL12.SQL2014\MSSQL\Backup\TestDatabase.bak'
WITH INIT;
GO

-- create a table for testing purposes
USE TestDatabase;
GO

CREATE TABLE dbo.TestTable
(
 Id int identity(1,1) PRIMARY KEY
 , StringColumn nvarchar(600)
 , IntColumn bigint
);
GO

-- Insert the first record
INSERT INTO dbo.TestTable
 (StringColumn, IntColumn)
VALUES ('This is the first data', 12345);

-- Check records. You should see one record
SELECT * FROM dbo.TestTable

-- Perform first transaction log backup
-- This backup contains our first record inserted
BACKUP LOG TestDatabase
 TO DISK =
 'C:\Program Files\Microsoft SQL Server\MSSQL12.SQL2014\MSSQL\Backup\TestDatabase_log.trn'
WITH INIT;
GO

-- Insert the second record
INSERT INTO dbo.TestTable
 (StringColumn, IntColumn)
VALUES ('This is the second data', 12345);

-- Check records. You should see two records now
SELECT * FROM dbo.TestTable

-- Perform the second transaction log backup
-- This backup contains first and second records inserted
BACKUP LOG TestDatabase
 TO DISK = 'C:\Program Files\Microsoft SQL Server\MSSQL12.SQL2014\MSSQL\Backup\TestDatabase_log.trn'
WITH NOINIT;
GO

-- Insert the third record
INSERT INTO dbo.TestTable
 (StringColumn, IntColumn)
VALUES ('This is the third data', 12345);

-- Check records. You should see three records now
SELECT * FROM dbo.TestTable

-- Perform the third transaction log backup
-- This backup contains first, second and third records inserted
BACKUP LOG TestDatabase
 TO DISK = 'C:\Program Files\Microsoft SQL Server\MSSQL12.SQL2014\MSSQL\Backup\TestDatabase_log.trn'
WITH NOINIT;
GO


Assume that we need to restore up to the second record and we do not know the exact time which record was inserted, and we do not know which transaction log backup holds it. Then only option is, using STANDBY option, here is the way of doing it.

-- Restoring the full backup
USE master;
GO

RESTORE DATABASE TestDatabase
 FROM DISK = 'C:\Program Files\Microsoft SQL Server\MSSQL12.SQL2014\MSSQL\Backup\TestDatabase.bak'
WITH REPLACE, NORECOVERY;
GO

-- Check the state of the database
-- This will show as "Restoring"
SELECT 
 name, state_desc
FROM sys.databases
WHERE name = 'TestDatabase';
GO

-- Restore first log with STANDBY instead NORECOVERY
RESTORE DATABASE TestDatabase
 FROM DISK = 'C:\Program Files\Microsoft SQL Server\MSSQL12.SQL2014\MSSQL\Backup\TestDatabase_log.trn'
WITH FILE =1, STANDBY = 'C:\Program Files\Microsoft SQL Server\MSSQL12.SQL2014\MSSQL\Backup\ROLLBACK_UNDO_TestDatabase_.bak';
GO

-- Read the state of the database
-- Now you will see that it is "online".
-- But remember, now the database is read-only.
-- Have a look on it with Object Explorer, you will the state.
SELECT 
 name, state_desc
FROM sys.databases
WHERE name = 'TestDatabase';
GO

-- Read the table
USE TestDatabase;
GO

SELECT * FROM dbo.TestTable;
-- We see the first record, but we need the second record.
-- Now let's try with our second log backup.


USE master;
GO

RESTORE LOG TestDatabase
 FROM DISK = 'C:\Program Files\Microsoft SQL Server\MSSQL12.SQL2014\MSSQL\Backup\TestDatabase_log.trn'
WITH FILE =2, STANDBY = 'C:\Program Files\Microsoft SQL Server\MSSQL12.SQL2014\MSSQL\Backup\ROLLBACK_UNDO_TestDatabase_.bak';
GO

-- Again, let read the table
USE TestDatabase;
GO

SELECT * FROM dbo.TestTable;
-- As you see, we have the required record.
-- No need to continue the restore operation.
-- Let's complete the restore process

USE master;
GO

RESTORE DATABASE TestDatabase WITH RECOVERY;

-- Done.